Measurement Tool
Description: A Measurement Tool is an item that can be used to create jumps.
Always use the measurement tool to delete a jump - do not destroy them by hand or the invisible jump control will remain!
Details:
| Rarity color: | Common |
| Renewable: | Yes |
| Stackable: | Yes (64) |
Obtaining
Crafting
A Measurement Tool can be crafted with 1 Amethyst and 3 Iron Ingots.

Usage
Creating A Jump
Measurement Tools can be used to create jumps. This is done by placing two markers blocks with five empty spaces between them. 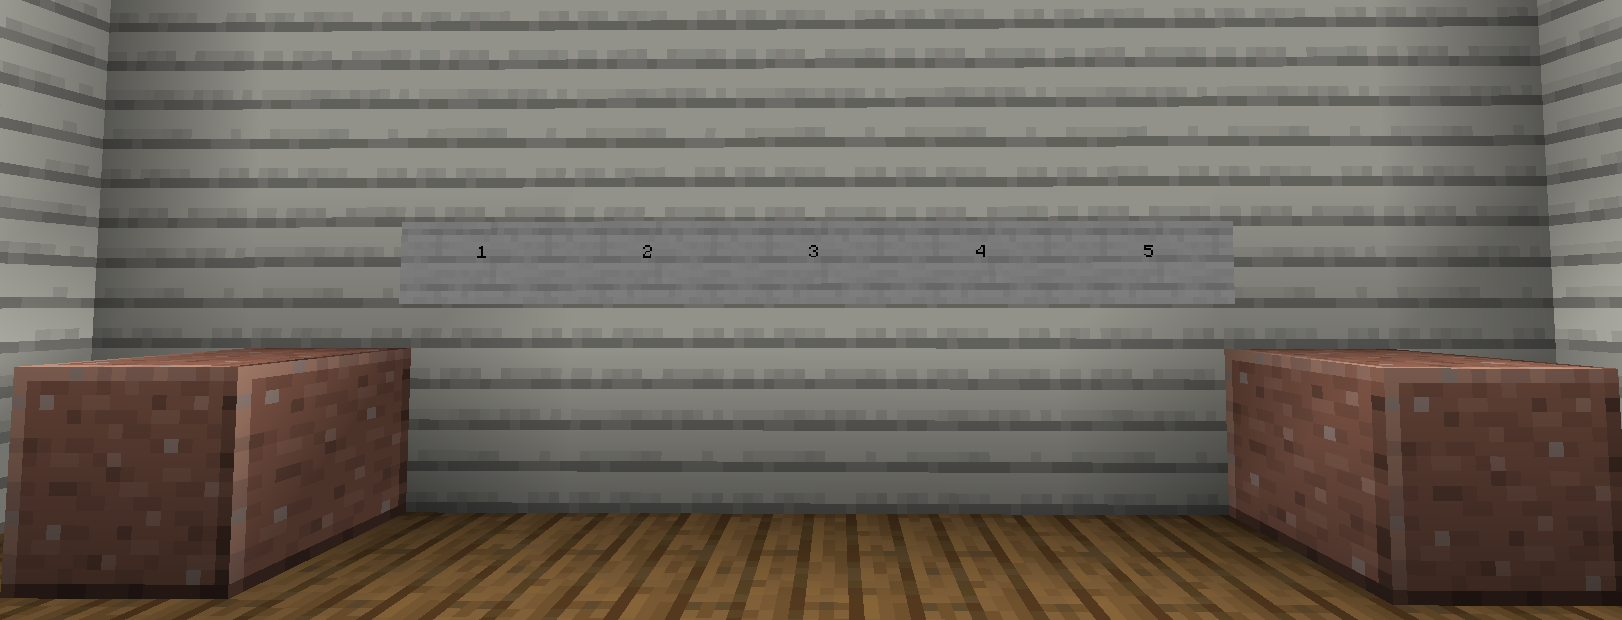
OnceMarker thisblocks can be any vanilla or modded building block. For the example shown below, red concrete was used.
Stand facing the marker blocks, right click the first block then move sideways to right click the second.
Error messages can be seen above the inventory hotbar when the Measurement Tool is done,used incorrectly.


Still stuck? Check out Brooke's Video on YT!
Customizing Jumps
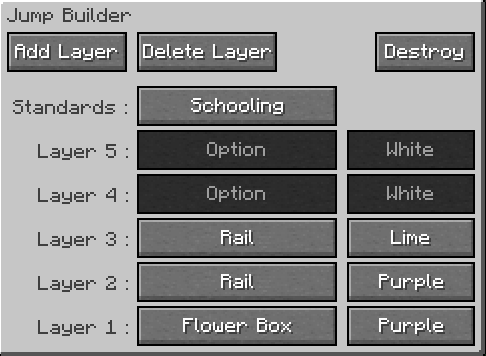
You need to interact with the playerJump to customize it's features. The Jump Customization GUI (menu) can facebe opened:
Type: Left click the None button next to Layer to cycle forward through obstacles, right click to go back.
Color: Left click the color button next to an obstacle to cycle through colors, right click to go back.
Some obstacle variants do not have a color option (aslogs shownetc)
Add: Left click the 'Add Layer' button in the
Delete: Left click the 'Delete Layer' button in the top left of the GUI to delete a layer (One block lower)
Edit Standards Type: Left click the button next to 'Standards' to cycle between jump standards (posts that support poles)
Delete Jump
If you want to get rid of the entire jump, left click the 'Destroy' button in the top right of the GUI. Do not destroy jumps by hand or the invisible jump controls will remain!
Variations
Bases are elements of the jump that can only be used on Level 1 and right-clicksit directly on the ground. These offer great customization options for jumps of every type and theme.
Base Elements (Obstacles) Layer 1 Only
Log A solid oak log block (slightly thinner than a normal block) ideal for XC jumps. None Pole On Box (Small) A pole on a small X shaped box, ideal for training and cavaletti 16 Colors Pole On Box (Large) A pole on a slightly higher X shaped box, ideal for training and cavaletti 16 Colors Brush Box A small bushy plant in a whitewash planter, ideal for Show Jumping None Flower Box A small planter of colorful flowers, ideal for Show Jumping 16 Colors Coop A small triangular fence obstacle, ideal for XC jumps or dressage borders None Roll Top A quarter-circle curved obstacle, ideal for XC jumps 16 Colors Wall Mini A brick-wall slab None Ground Pole A simple striped pole that sits directly on the ground, ideal for training and cavaletti 16 Colors Elements (Obstacles) Any Layer 1-5
None No visible obstacle for that layer (will still have an invisible obstacle) N/A Rail A simple striped pole 16 Colors Plank A striped plank 16 Colors Plank Fancy A solid-color wavy plank 16 Colors
Standards (Support Posts on the side of
None No standards - Jumps with poles or planks may appear to float without standards N/A Schooling A simple upright post with a small base. N/A Radial A wider based standard with a circular pattern (level 3+) N/A Vertical Slat A wider based standard with a simple wooden slat design N/A
Other information
Troubleshooting
Error Messages (Incorrect Use)
Text above the inventory hotbar can inform a user that they are using the Measurement Tool incorrectly. There are 4 error messages in total that can appear for any of the most common user-errors when making jumps.

A
Solution: screenCheck that there is exactly 5 blocks between marker blocks. B-S-S-S-S-S-B (B = Block, S = Space/Air) Too many spaces or too few and the jump will appear,not allowingbe created.

Solution: Face your first marker block, right click the block. Move sideways (do not turn!) until you are in front of the second block, right click it.

Solution: One of your blocks is not directly opposite the other marker, make sure they are on a straight line and not at an angle.

Solution: One of your blocks is at a different height than the other marker, make sure both blocks are at same Y level (on level ground)
Known Issues
It is strongly recommended that youjumps like.(and Youother multiblock items like stall doors) are deleted prior to taking a WorldEdit selection. Including jumps and stall doors in WE Schematics can alsopotentially customizecorrupt the Standards by right-clicking "Schooling". The more Layers you add, the taller your jump will be. Each Layer comes in the 16 colors of Minecraft. You can choose "Delete Layer" if you want to remove a level of the jump. The "Destroy" button should only be used to completely remove the jump.
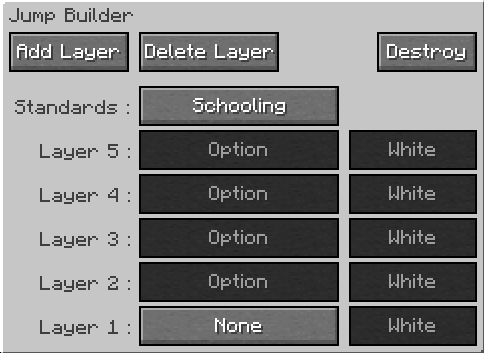
The jump gui screen.
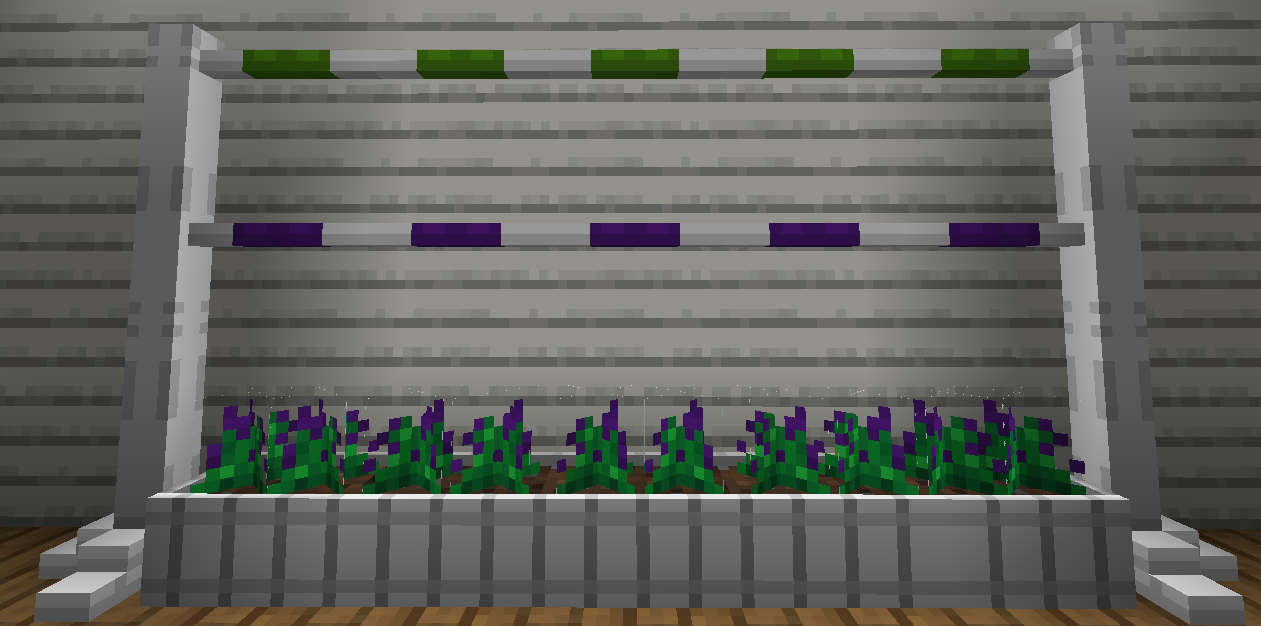
Here is an example of a jump:
You should always use the GUI destroy button where possible when clearing jumps, to remove all visible/invisible sections.schematic.