Server Help
Here's how the server works!
Landclaim
Plots
There are designated plots, setup as neighborhoods, on the VIP server that you can use to build and play on.
Rules
- ALL land within the plot must be claimed by the owner to protect the builds. You should not just claim the perimeter.
- You must not claim any additional unapproved plots - these claims will be removed and demolished without notice.
- You must not claim the plots of ex-VIPs (w/wo consent) - Ex-VIP plots can be removed at any time after 30-60D.
- You must not build over onto claimed or unclaimed plots, nor edit the colored perimeter of any plot but your own!
- You must not build on, claim, or edit the roads surrounding yours or others plot.
- You can ally other players using FTBTeams to give others permission to build on your plots (see below).
You should not claim land anywhere outside of marked and assigned plots in the residential zone or survival dimension.
If a plot is claimed outside of permitted areas, the player will get a tagged notice of the following:
- If there were no notable builds - the area will be unclaimed and the land returned to its original state. The player must select a new area to claim within permitted plots.
- If there were notable builds - the builds would have been moved to an open plot. Any builds outside of the permitted one plot area will be destroyed. We will attempt to save the most important builds first.
- If there were tamed and named animals - they will be taken to the rescue and logged. The player will need to fill out separate Retrieve Forms per animal to retrieve them.
- If there were animals not named and/or tamed (either) - they will be destroyed. The player will need to remake them.
How to Claim
SWEM uses FTBChunks mod to allow players to claim their property. When claimed, another player cannot alter anything on the property without being in a team with you OR depending on your property settings. Each player's claim will be a random colour and can be viewed on both the FTB world and minimap.
Initial claim limit will be 1 chunks - enough to claim one Starter Plot. VIPs who buy another plot will be given additional claim chunks that matches the size of their new home.
- Stand on your plot, somewhere near the middle if possible.
- Open the FTB Chunks map - by default this is M but you may need to adjust your keybinds if using Xaeros too.
- Select the grid icon in the top left corner of the map, this will show the area around you.
- Claim: Left clicking a square (chunk) will claim it an area that is unowned.
- Remove Claim: Right clicking a square (chunk) will unclaim an area if you own it.
- Claim all areas within the perimeter of your plot (marked with concrete)
- You may need to stand elsewhere if you couldn't view the whole plot area and need to claim more.
If a chunk already has a color, it is claimed. You cannot claim or unclaim chunks owned by other players (unless CV+)
Creating & Managing Teams
SWEM uses FTBTeams to allow players to form teams and entrust other players on their property. Having a team also allows you to adjust default settings on whether players can or cannot do something on your property without being a team member.
/ftbteams party create - forms a team that you are the leader of. You will need to leave any other teams you are in.
/ftbteams party allies add [player] - add a player to your ally list, which will give them trusted perms to build/interact with your plot.
/ftbteams party allies remove [player] - removes an allied player
/ftbteams party allies list - shows all players allied on your team/plots
/ftbteams party invite - DO NOT USE
Cooperative Teams
We do not advise forming multi-person teams with the current plot setup, and joining teams is not permitted (as it transfers your plot claim to the team leader). Instead we suggest allying users instead on your personal team/plot. This will allow them to do whatever your settings permit, but you will not share chunks. Note that if you do decide to team up, the following applies:
Claim Removal
Plots may be removed if players are inactive (no longer a VIP member) for a while.
- One month (30D) if the plot has no completed structures on it
- Two months (60D) if the plot has a completed structure on - in case a player wishes to return after a short break
- No actively donating VIPs will have their claim removed for inactivity - even if they do not play.
Our protocol for plot removal:
- All animals will be removed unless another player steps forward to claim them (within their limit) in advance!
- The plot will be cleared so it can be assigned to another VIP.
World Edit
Permissions
World Edit permissions are given to staff members who are both competent in the use of W/E, who are prepared to offer assistance to users wanting W/E completed, and who are trusted with the enhanced permissions.
We are not able to offer World Edit perms to Horse People or all VIPs as inexperienced use or accidents can cause catastrophic damage to the server and all builds, entities, or terrain on it. We also wish to avoid the slim but possible use of World Edit for griefing.
World Edit Request Information
Our staff offer a voluntary service to fulfil World Edit requests to VIP users. Please note:
- World Edit requests will be fulfilled as soon as possible, but there is no firmly set time limit or guarantees
- We do not have enough staff with W/E experience to reliably offer it at all times.
- Staff have their own play-time. Just because they are online, that does not mean they are on duty.
- World Edit request will:
- Be done in order of submission - please do not expect staff to do yours immediately if others are waiting.
- An exception MAY be made if a staff is not able to fulfil existing requests, or has limited time (quick requests)
- Staff will not necessarily be online to do W/E requests and may be taking a break themselves.
- You should submit ALL requests, and not directly ask staff. You can mention one was submitted, but please observe the above point.
Submitting A Request
You can submit W/E requests at the World Edit Office on the VIP server - it is located in Spawn and has a gray banner with a grass block on the front of the building.
| You should provide: | |
| Location |
Where your property is located - Please provide coordinates and the plot name. |
| Task |
What you would like done (i.e brush a path with blocks A, B & C) - One task per request. If you have multiple tasks, you can submit a Large W/E Request. |
| Details |
Where does this need to be completed? Have you marked the area? What exactly are you expecting and do you have any specific requests on how it is done? Is there anything staff need to be aware of when completing the task? |
| Your request may be rejected if: | |
| Ownership |
You request W/E on a property you do not own. Only the owner can do so. |
| Expectations |
It is an unreasonable request that the player could complete themselves in creative. It requires too much of staff's time (more than 5-10 minutes) - longer tasks are not guaranteed! It is too complex, requiring specialist skills or experience with W/E (difficult or detailed terrain) |
| Details |
You do not provide enough information for a staff member to complete the task while you are offline. It is not stated where you want the W/E task to be done or your description is too unclear. It is unclear what you are requesting at all. |
| Invalid |
W/E requests are not for staff to build for you. Requests to build or design will be rejected. W/E requests are not offered in some dimensions: Survival, Nether, The End. |
| Additional: | |
| Ping | You will be pinged in VIP- notices if your task was completed, or rejected. |
|
- You must remove ALL animals first, or move them to a corner of the property that is not in the way and staff will clear around it. - Do not request demolition until you are fully prepared and have anything you need from the property. - Demolition requests may be completed while you are offline, be clear what you want demolished. |
|
| Relocation |
- You can only request relocation if you have not been relocated in that month. - You must board / relocate ALL animals and NOT expect staff to move or get rid of any you leave behind! - Discuss with staff if you need temp. use of a vacant plot, or a temp. local waystone to transport animals. - The old plot will be demolished after relocation - take everything you need before requesting relocation! - Any animals on the existing plot, or the new plot could be crushed when relocating or demolishing. - You must be online to relocate as you will need to unclaim and claim new properties. |
Schematics
Schematics are not offered. Instead we recommend that users take images or video walkthroughs to recreate the builds elsewhere if desired. If you wish to rebuild another's build, credits are required.
[1.18] VIP Server & Modpack
Join The Server
In order to join the server you must have:
- A compatible modpack including ALL library and core mods
- The server IP - Available from Server-Info channel.
- Be whitelisted to join - Request in Whitelisting Thread under Server-Info channel.
- An active VIP membership
If you are unable to join the VIP server, please check you have the modlist shown below and you are using the correct IP.
You can ask for help in VIP Server Help if you cannot join after trying the above.
CurseForge Manifest (Regular): DOWNLOAD HERE
CurseForge Manifest (Shaders): DOWNLOAD HERE
How to install a CurseForge manifest is explained below - please scroll and read this before requesting help!
Installing Mods
If you do not know how to use mods, please check out our Installing Mods page on the wiki!
Using CurseForge Manifests
CurseForge no longer supports modpacks for other launchers - so you cannot just download a full ZIP of the mods required. This means servers either need to manually ZIP their mods (depriving themselves and other developers of downloads) or use a CurseForge manifest. Manifests are information that tell the CurseForge launcher which mods to download and which versions as well as configs etc so you can quickly import a profile and its settings to play with that modpack or join servers using their required modpacks. The downside of this is it means only the CurseForge app can do this!
How To (CurseForge app)
- Download the Curseforge Manifest (Regular) OR the CurseForge Manifest (Shaders/Rubidium)
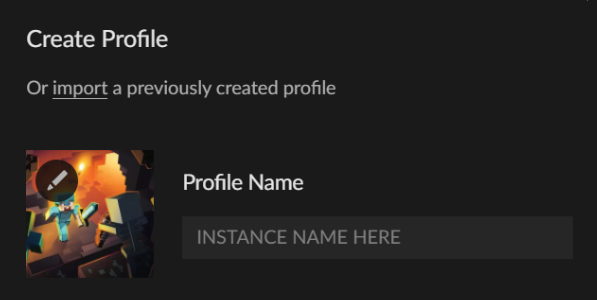
- On the CurseForge App, select Create Custom Profile on the top bar to open a preferences menu.

3. Select the underlined section that says to Import a previously created profile
4. Select the downloaded file (Manifest)
How To (Other Launchers)
Other launchers cannot use Manifests - your only options are:
- Download all mod versions manually using our modlist
- Download the mods on the Curseforge App and copy them from the modfolder into another launcher
In short, if you want an easy life and easy download, use CurseForge to download and play. If you're a firm supporter or another launcher, you will have to do a little extra preparation to initially download AND to maintain your modpack as it will not automatically update if any server changes are made.
We will NOT offer a ZIP or MultiMC (or other launcher) export out of respect for other developers and their downloads.
Modlist
Updated: 17 July 2023
Minecraft Version: 1.18.2
Forge Version: 40.2.0 or above
Java Version: Java 17
If installing these mods manually you MUST use only 1.18.2 Forge versions - other versions or APIs will not work!
- LIBRARY & CORE mods are required to join the server - incorrect versions or missing mods will not let you join servers
- CLIENT & GRAPHIC mods are optional - you can remove any you do not want or need to increase performance
| Mod | Type | Version | Description |
| Architectury | Library | 4.11.93 | -- |
| Balm | Library | 3.2.6 | -- |
| Cloth Config | Library | 6.5.102 | -- |
| Creative Core | Library | 2.6.16 | -- |
| Curios API | Library | 5.0.9.1 | -- |
| FTB Library | Library | build.177 | Dependency for FTB Mods. |
| FTB Teams | Library | build.107 | |
| GeckoLib | Library | 3.0.57 | Dependency for SWEM. |
| Item Filters | Library | build.50 | Dependency for FTB Quests. |
| Placebo | Library | 6.6.7 | |
| PlayerAnimator | Library | 1.0.2+1.18 | Dependency for SWEM. |
| Astikor Carts | Core | 1.1.2 | Carts for transporting items, livestock and farming. |
| Comforts | Core | 5.0.0.6 | Quality of life additions like sleeping bags. |
| Cosmetic Armor Reworked | Core | v2a | Wear armor without displaying it on player. |
| Creeper Confetti | Core | 3.11 | Harmless confetti explosion creepers. |
| Dimensional World Border | Core | 2.0.0.1 | |
| Farmer's Delight | Core | 1.2.2 | Food, cooking and new crops relating to food. |
| Farmer's Respite | Core | 1.3.0 | Teas and new crops for brewing drinks. |
| FTB Chunks | Core | build.265 | Landclaim chunks to protect properties. |
| FTB Quests | Core | build.191 | Quests that can be completed for rewards. |
| Gravestone Mod | Core | 1.0.1 | Graves that store a player's items on death. |
| Harder Natural Healing | Core | 1.39.0.13 | Hunger in peaceful dimensions and healing rate changes. |
| HT's TreeChop | Core | 0.17.7 | Chop a whole tree down at one time by cutting the base. |
| Inventory Essentials | Core | 4.0.3 | |
| Inventory Sorter | Core | 19.0.4 | Keybind a button that auto stacks and sorts your inventories. |
| PlayerRevive | Core | 2.0.13 | Save other players (nearby) from near death. |
| Polymorph | Core | 0.46 | Select output item from duplicated recipes. |
| Quest Additions | Core | 1.4.2 | |
| Simple Shops | Core | 1.2.1 | Protected stores that player can display and sell items from. |
| Simple Storage Network | Core | 1.7.0 | Enhanced and consolidated connective storage system. |
| Star Worm Decor | Core | 3.1.2 | Hundreds of additional blocks and variations. |
| Star Worm Economy | Core | 1.1.1 | Currency and systems for storing and transferring funds. |
| Star Worm Equestrian | Core | 1.3.0-15 | Realistic horses with needs, items, decor. |
| Star Worm Lighting | Core | 2.0.3 | 'Glow' blocks that match MC + DM blocks with light output. |
| Star Worm Plus | Core | 2.9.0 | Various QOL recipes, items and function features. |
| Waystones | Core | 10.2.1 | Waystones to teleport between locations. |
| Appleskin | Client | 2.4.1 | Food saturation overlay and info on food saturation values. |
| Better F3 | Client | 3.0.0 | |
| Chatheads | Client | 0.6.1 | Shows player head icons in chatbox and playerlist. |
| Connectivity | Client | 3.2 | |
| Controlling | Client | 9.0+23 | Search box for keybinds to search by specific key or term. |
| Dynamic View | Client | 2.8 | |
| Edit Sign | Client | 2.3.1 | Right-click editing for sign text. |
| Ferrite Core | Client | 4.2.2 | Massively improves RAM usage - highly recommended! |
| HT's TreeChop - Jade Plugin | Client | 0.1.1 | Shows the number of logs in a tree that can be broken. |
| Jade | Client | 5.3.0 | Shows information on looking at blocks etc. |
| Jade AddOns | Client | 2.5.0 | |
| JEI Enchantment Info | Client | 1.17.1-2.0.0 | |
| JEI Integration | Client | 9.0.0.37 | |
| JEI Enough Effect Description | Client | 1.11 | |
| Just Enough Items | Client | 9.7.2.1001 | Lookup item crafting recipe, or view item use in other recipes. |
| Just Enough Professions | Client | 1.3.0 | Lookup items acquired from various villagers / trades. |
| Just Enough Resources | Client | 0.14.1.171 | |
| Log Begone | Client | 1.0.4 | |
| Mouse Tweaks | Client | 2.21 | |
| My Server Is Compatible | Client | 1.0 | |
| Shutup Experimental Settings! | Client | 1.0.5 | Removes a (harmless) warning about experimental settings. |
| Skin Layers 3D | Client | 1.5.2 | Player's skins appear 3D and different textures stand out. |
| Toast Control | Client | 6.0.3 | |
| WorldEdit | Client | 7.2.10 | Not required on server - add for Singleplayer world. |
| WorldEdit CUI | Client | 3.1.0 | Not required on server - add for Singleplayer world. |
| Xaero's Minimap | Client | 23.5.0 | Optional extra map with many cool features/functions. |
| Xaero's Worldmap | Client | 1.30.6 | Optional extra map with many cool features/functions. |
| Optifine (OPTIONAL and not recommended unless you can or will use Shaders or require it for a TXP) | |||
| Optifine | Graphics | HD U H9 | Allows customization of graphics settings + running shaders. |
| Optifine Alternatives (OPTIONAL and only necessary if you can or will use Shaders or like the features they add) READ MORE HERE |
|||
| Better FPS | Graphics | 1.5 | |
| Better Rubidium Video Settings | Graphics | 1.0.4 | Returns Rubidium's video settings to Minecraft style. |
| CIT Resewn | Graphics | Creator's DC | Only required for CIT packs. |
| Entity Model Features | Graphics | Creator's DC | Only required for TXPs adding custom entity models (CEM) |
| Entity Texture Features | Graphics | 4.4.4 | Emissive textures for entities. |
| Luscent | Graphics | 1.2.2 | Dynamic lighting. |
| Magnesium/Rubidium Extras | Graphics | 1.3.2 | Zoom key, borderless full screen, entity culling etc. |
| Oculus | Graphics | 1.5.2 | Allows use of shaders - fast loading and high-performance. |
| Rubidium | Graphics | 0.5.6 | Incorporates many of Optifine's features. |
Changelog
View Changes
This is not a complete list of version changes / fixes. It is a changelog of relevant wiki-related version information.
| MC Version | Date | Notes |
| 1.18.2 |
21 August 2023 |
SWEM Updated to 1.3.0-15 (from 1.3.0-12) SWPM Updated to 2.9.0 (from 2.8.1) SWDM Updated to 3.1.2 (from 3.1.1) |
| 29 July 2023 |
Removed XP from Harvest |
|
|
Added Harder Natural Healing 1.18.1-1.39.0.13 Added Inventory Sorter 1.18.2-19.0.4 |
||
|
SWEM Updated to 1.3.0-12 (from 1.3.0-8) SWPM Updated to 1.8.1 (from 1.5.0) SWDM Updated to 3.1.1 (from 3.1.0) SWEConM Updated to 1.1.1 (from 1.1.0) |
||
| 19 July 2023 | SWEM updated to 1.3.0-8 (from 1.3.0-7) and SWPM updated to 1.5.0 (from 1.4.0) |
FAQs & How To
THIS PAGE IS A WORK IN PROGRESS
This is a comprehensive guide for new joiners or frequently asked questions. Use the navigation bar on the left of the screen to jump to a section you are interested in, and use the drop downs to view more information on various topics.
Looking for something specific, search using Ctrl + F (PC) to find keywords.
New Players
As a new player, there might be a lot to take in. Here are some sections that might help you get started easier!
Completing The Tutorial
On first join, you will spawn into a box - step on the pressure plate to warp to the tutorial.
After warping, make sure you read the information in the first chamber before progressing on to other rooms. Check your inventory - the block you receive is part of a puzzle required to complete the tutorial. Once completed, you will have a server access token to take back into the first chamber so you can warp out into the playable world. You will be unable to leave without this. On exiting the tutorial area, you will be expected to follow all server rules - these are listed here if you prefer to read them on the Wiki instead.
Moderators will assist you if there is a problem with the tutorial, but will not tell you how to complete the puzzle.
Viewing & Completing Quests
Quests help you use your time on server productively, profitably and just for fun! You can open the quest menu in three different ways:
- Via a quest book that you receive during your tutorial / can be crafted again later if lost
- Via your player inventory (E) there is a book symbol in the top left corner of the screen
- Via a hotkey - for many this is the Home key, but you can change or check this Options > Controls > Keybinds
When opening the quest book, you will first see the tutorial page that looks like this:

This is not all there is to our questing, hover over the ▶ symbol on the left of the screen to view Chapters.
Chapters are different sections of questing that you can complete in your own time - there's no rush. Click one to view it.
- Getting Started - Crafting items earns you rewards for early-game necessities. Recommended for new joiners.
- Server Tour - Exploring the server to learn important locations earns you money. Recommended for new joiners.
- Jobs - Jobs are not quests you complete, but show you where to go and what to sell for money.
- Achievements - A collection of statistic based achievements such as time online, time on horseback, monsters killed.
- Time Based - A couple quests to collect your daily (24hr) free tokens, or pay shop rent if you have one!
- Good Samaritan - A selection of charitable quests that exchange money for free items given to all online players!
- Emergency Services - A selection of emergency quests that exchange money for item or food bundles, or home TPs.
- There are some other hidden options that you'll unlock as you play!
You can complete quests in different ways, depending on what type of quest it is.
- Submit items - open the quest, click the required item and press submit - it will take from your inventory.
- Craft items - on crafting a suitable item (may be a specific color etc), the quest will auto complete.
- Visit locations - explore and learn the dimensions, the quest will auto complete in a specific location/radius.
- Other quests require you to kill entities, break blocks or achieve a set level of MC game statistics to auto complete.
When a quest is completed, you can claim the rewards one of two ways:
- Click on the quest reward with a ! over it to claim that reward. Quests displaying ! have a reward to collect.
- Click on the bag with arrows icon in the top right of the screen to collect all rewards. Note that some rewards cannot be auto collected, such as your emergency TP.
If you have any issues with quests, please put a screenshot + description of the issue in VIP-server-help (Discord).
Getting A Starter Home
As a new player, you can claim a free pre-built 1 chunk home to use while you need it - this is generally until you have T5,000 to upgrade your plot to a 2 X 2 chunk plot. These homes are located near Marion Meeting Place (where you first spawn after completing the tutorial). Open your FTBMap with M to view the claims and look for a starter home that is not claimed or destroyed - this is sometimes the case after players move out. Make sure you are getting a good condition, vacant home to call your own while you get used to the server.
Once you have found a home, you must claim it, and you can do this one of 2 ways:
- Stand in the chunk (within the stone borders) and type: /ftbchunks claim
- Open the FTB Map with M and click the grid icon in the top left corner of the screen, left click the chunk to claim it.
A couple other things to note about starter homes:
- You may only have one, and you must not move into or destroy any other homes intended for new players.
- You receive only one chunk on joining, and must use this on a starter home only. You cannot live elsewhere.
- You should keep your starter home only if you need it, you may be asked to move out if your wealth exceeds 20K.
- You can destroy and remodel your starter home, and take items or materials from it upon moving out.
- You may keep only 1 Horse and 1 Pet of each type if you have a space that is within welfare standards.
If you are fortunate enough to get one of the limited 2X1 starter plots, contact a Mod+ for additional claim chunks.
You are strongly advised not to live with other players - in any property dispute, the claiming player owns everything.
Accessing, Using & Earning Money
The VIP server uses Star Worm Economy Mod (SWEConM) for our currency.
Your wallet funds can be stolen from in PVP dimensions if you are killed - keep your wallet funds below T250!
Money Basics
When you earn money via quests, trading with players, selling to shops you will often receive this in coin form - each coin represents a different kind of currency, from Copper Thyms (1) all the way up to Amethyst Thyms (500). You can keep these coins in your inventory, but they are best stored in either a wallet, wristlet, or a vault. Read more about these on the linked pages.

Using Money
You can use your money in various ways, depending on what it is you are trying to do.
- To buy from a shop block, you need to withdraw and hold the right type and number of coins, right click to buy.
- To buy from a player, you can exchange money by:
Throwing them the correct value in coins if they are online
Putting the funds into their home mailbox if they are offline
Doing a direct transfer via commands: /sweconm transfer [yourname] [playername] [amount] [optional reference] - To pay for a server services, please read the instructions provided. Most services require you to name your Thyms in an anvil and throw them into a hopper with your application.
Earning Money
You can earn money through several different ways.
- Gather resources from the wilds and sell them to the server stores - different stores/locations buy different things.
Sell set items to job locations - view which stores buy what in the Jobs Quest category.
Sell a variable set of items to the Pawn Shop in Alaharra - view the current options, which might change. - Achieve quest rewards for exploration (Server Tour), discovering Secrets etc.
- Achieve quest rewards for your regular activity online; Time Played, Time on Horseback etc.
- Trade with other players casually, or start a store.
- Offer goods and services, post about this in the VIP-server-forums!
Getting A Horse
Horses are a valuable companion on the VIP server - you will need to be responsible for its care, and careful about keeping it safe outside of the peaceful difficulty zones of VIP or Alaharra.
- As a new player, you can purchase one spawn egg for T1000. Spawn it on your plot in a safe place.
- You can rescue a horse by applying for an available coat at our Golden Equine Adoption Center (24-48hr wait)
- You can purchase a horse from another player if they are selling one.
- You can breed a horse from two horses if you know someone willing to permit to you, or you have 2 horses*
Values - A helpful guide to getting what is fair
Horses - 1K untrained, more if the coat is highly sought after, more still if the skills are high (~5K+)
Spawn Eggs - No set price, but these are incredibly rare and almost a collective item to some.
Breeding Token - ~1K each
Your breeding tokens and spawn eggs are rare - report to a Mod if you are specifically targeted to sell this on joining.
* You can only own as many horses as your plot permits within welfare standards, and only one on a starter plot.
Gathering Resources
You should be able to get most blocks, ores or items you need to survive and build in our resource dimensions via Waystones.
These are survival dimensions where you must fend for yourself in either PVE (vs environment) or PVP (vs player).
- Wilds [PVE] - Waystone located at VIP Spawn
- Nether [PVP] - Waystone located West of VIP Spawn
- End [PVP] - Coming soon
While in the resource dimensions, you must follow the dimension rules.
Deaths & Graves
Our server is wholly survival/adventure - which means you can and likely will die at some point. Do not fret though, your stuff will be stored safely in a grave where you died and will not despawn, nor can it be taken by another player. Your obituary (note) has coordinates of your death and a list of all items - keep this safe until you have retrieved your grave.
You must collect your own grave in these dimensions - UNLESS you are in an adventure or protected zone:
- Wilds
- Nether
- End
You can put in for a grave retrieval in these dimensions - a Mod+ will collect your grave and put it into the graveyard:
- VIP (Plots)
- Alaharra
- Golden Equine
How to break your grave
Break (by hitting) the grave. Items will be put back into your inventory in the same slots they were before death.
How to put in for grave retrieval
Take your obituary to the graveyard in VIP - located near Marion Meeting (196 76 209) - and throw your obituary into the hopper. If there is an on-duty* Mod or Admin online, please mention you have done so as we will check when available - which may not be immediately. If there are no Mods+ online, grave retrieval is checked at least once a day. On duty mods show as yellow or orange in the player list, with yellow or orange chat text. Once retrieved, you will be tagged!
Breaking graves may overwrite items you already have in your inventory. Its recommended to drop or store items first.
Novice Players
Even as you get accustomed to the basics, there may still be things you are not quite sure on or never knew you could do. Here are some sections that might help you keep on moving up!
Teams & Allies
You can create a team to ally others so they can interact with your plot. When allied, players will have a default or specifically adjusted set of permissions to any claims you have - please read this section carefully before allying people.
Only ever ally players you trust - especially if you have a lenient set of access permissions!
How to create a Team
Go into Options > Controls > Keybinds and check or set the keybind for Open Teams GUI. Use this keybind to access it.
Use the create a team button, give your team a name and a description (optional).
Adjust your team settings
After creating a team, click the gear icon in the GUI to adjust the team settings to your liking. You can:
- Block Edit Mode - Set to private if you do not want players to be able to place or break blocks on your property.
- Block Interact Mode - Set to private if you do not want players to be able to interact with doors, chests, levers etc.
- Entity Interact Mode - Set to private if you do not want players to be able to interact (lead/breed etc) entities.
- Non-Living-Entity Attack Mode - Set to private if you do not want players to be able to break paintings, item frames etc.
- Claim visibility - THIS MUST BE SET TO PUBLIC.
- You can also edit team name, description, claim color.
If you set any of these values to public any player, even if they are not allied, will have permissions to do those things!
Adding Allies
Once created, click the people icon to Manage Allies and select an online player to ally. They will have permissions on your property - depending on what you set - with immediate effect.
Removing Allies
Right click an ally in your team menu and select Un-Ally with [playername].
Upgrading Plots, Moving Out & Claims
COMING SOON
Horse Ownership & Breeding
COMING SOON
Frequently Asked Questions
Why are there no monsters in XYZ dimension?
Some dimensions are set to peaceful so players can explore, compete and live in peace without dangerous mobs. These dimensions are VIP (plots), Alaharra and Golden Equine.
Why do I still have hunger in peaceful dimensions?
We have a mod to keep hunger, even in peaceful as realistic player and horse needs are core to our server.